|
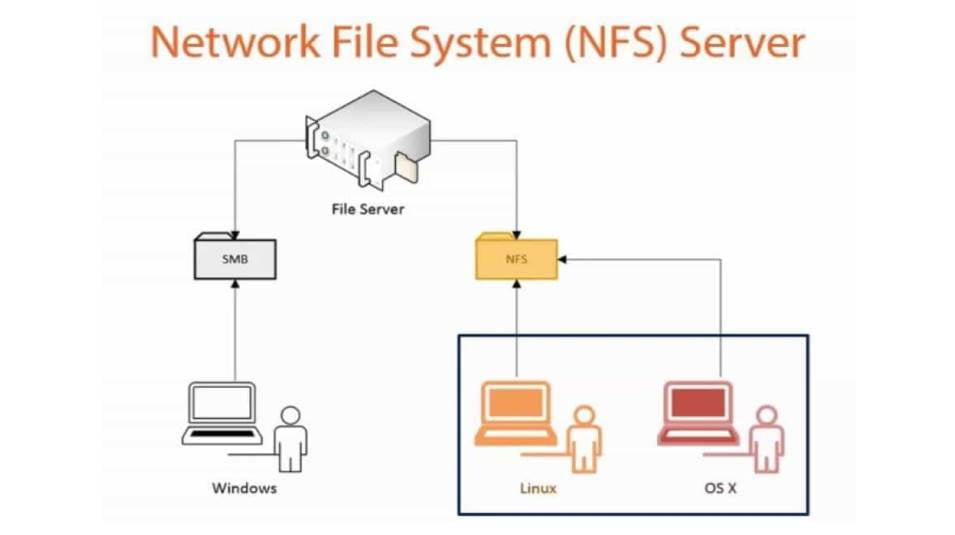
Today we will explain how to mount our NFS file server in Windows to share content with Android, something that is interesting for applications such as KODI to have access to our multimedia systems. A network file environment that is a good alternative to SMB, the system for sharing files by default in Windows that has some drawbacks like being slower than NFS. GENERAL CONCEPTS ABOUT NFSThe NFS (Network File System) protocol is the default network file system on UNIX systems and is found on most Linux distributions. This system can also be used in Windows and is natively supported in Android although there are not many applications that connect by default with this type of network. CONFIGURE NFS SERVER IN WINDOWSTo configure the NFS service in Windows, the simplest way is to use the WinNFSd program that allows us to run a server in our system from a Windows command line. We will explain in a simple way how to start it, it is not a complicated procedure but you have to have a basic knowledge of using the command line. Run NFS server in Windows in a simple way- Download our WinNFSd package with examples or we can go to the WinNFSd project.
- Unzip the ZIP and leave the folder in C: \ NFS (so that the examples work).
- Inside we can see two CMD files that execute the server in two variants.
– mount_dir.cmd = mount a directory in a folder at a network mount point.
– mount_exports.cmd = mount several folders with independent points. - mount dir.cmd run > C:\NFS\winnfsd. exe C:\NFS\Test1\ /Test1
– Run WinNFSd + local folder + net alias - mount_exports.cmd run> C:\NFS\ winnfsd.exe -pathFile “C: \NFS\exports.txt”
– Run WinNFSd + reading the file “exports.txt” in the same folder that defines several local folders for the network. - These commands are those that have not given us problems, we can see other options running WinNFSd.exe.
- We can modify the sample CMD with the routes that we have interesting.
- When running WinNFSd if everything worked correctly we will see n result similar to this:
 - In the Path line we can see how the directory and the alias of the network route have been mounted.
- If we type help it allows us to see the available commands.
- Do not close the window or the server will be closed. To exit write quit, if not the NFS service can be running.
CONFIGURE KODI WITH OUR NFS SERVER- Run KODI
- Enter in the category in which we want to add network content for example Videos.
- Enter in Files > Add Videos
- Click in Explore > Add network location.
In this window we add:
– Select NFS protocol.
– Our server IP (from a Windows console we can use the command “ipconfig”) .
– Name of the folder in the network or defined alias.
– Press OK.
 - Then we define the options of what type of content is going to be displayed and press OK.
- We will now have all the titles added to our library.
| 


All comments:3Replies